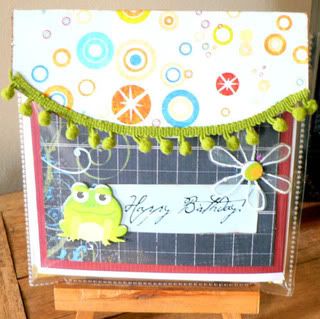
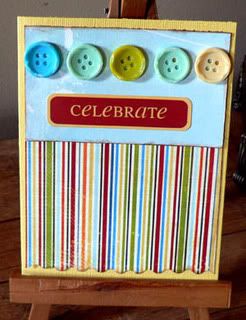
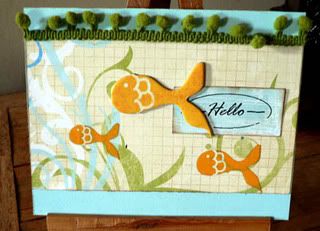
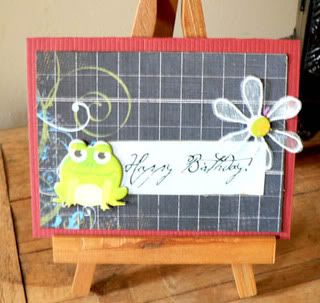
Here are a few more photos of cards I made for the fall festival.
We had a cold front come through today that has left me with scratchy yuck throat and weird ears. I hope it is just sinusy stuff. But I think Im gonna turn in early.
John made us some yummy warm chilly tonight was really good. Supposed to get cold down in the 40's (THAT IS COLD FOR US DOWN HERE IN MOBILE) I know alot of you all are having snow up north. We just get sand down here haha.
Tomorrow is the Fall Festival. With all this flu going around and my immune system. I won't be going. Nor to the BIG Field trip on Monday. Bella is NOT Happy. We have been having major problems and melt downs for a while now...but this week oh boy....
She had a complete melt down on Thursday. She watched a video from when she was a baby (I didn't realize she was watching it) she came running into where I was making cards at just crying her eyes out. I went down on my knees grabbing her pushing her hair back from her face looking to see what was wrong was she hurt? Injured? who did it!!! WHERE are they?!! Because those were very big tears for such a little girl. I knew something dreadful had to be going on with my sweet girl for such emotions to be flowing! "MOMMY! WHY CAN'T IT BE LIKE IT WAS AGAIN? BACK WHEN YOU WERE NOT SICK?" OH MY WORD!!a blade went through my very core and ripped my soul out. I wanted that too so very bad. Something I prayed for daily for since all this started. "OH Baby come here"
I just grabbed her and the tears just came out of me like crazy. I just held her and sobbed. THe one thing I wished I could give that child more than anything in this world. BUT the one thing I cant give her.... A cure for Multiple Sclerosis. It is so hard on our babies. The things that disease takes away. They don't understand and it is so difficult for them to understand that going out into the public can cause great harm and our regime we have to follow is very important. Can make me very sick. She is very protective.
we have had these shingles and staph infections so many times. But to look into that sweet face and hear those words and see those tears. is more than a mother can bear sometimes. So If you would tomorrow and this weekend and Monday. Say a little prayer for my baby girl. and when my kids mom isn't there . DON'T JUDGE and don't hate.. I know this mother would give everything in this world to be at every single function on the front row center watching her baby girl have the time of her life.
It IS the little things in life that are so precious that so many take for granted!
go hug your babies...
xoxox
Friday, October 16, 2009
Wednesday, October 14, 2009
CARDS FOR THE FALL FESTIVAL
I used The October Kit which was chunked full of October Afternoon Goodness (Which was perfect by the way) to do a set of cards for the Fall festival at Bella's school this weekend.(that I won't get to go to boo hoo) HOW CUTEEEE are these little animals? I thought they might would bring a pretty penny for the school in the country store. We have a booth every year with Handmade crafts and such. I will have a bunch of Cards in there (one of a kind no two are alike since they are all made from scraps) I am not a GREAT card maker...ok a good card maker for that much. Kinda like in singing make a joyful noise? I THINK I do better at altered art and Scrapbook pages but I know a lot of people really like cards. I LOVE GIVING THEM and ALSO LOVE getting them. So I have been pulling some all nighters working on them.
The first one. Is a sketch from my buddy Di Hickman. Ya she rocks like that. Check out her blog.(Tell her HI FOR me! That I sent ya Ovah!) She has really cool card sketches on there! She is really cool and is a fitness freak too. Be careful she will make you do like jog in place while you read.. ok maybe not but you will want to after talking to her and listening to her fitness routine.(Her abs are amazingggg though!) She makes me tired just listening to her. hehe.
You will see this card sketch on there is the one I used for this card.
Here is another one that I made just for kicks...
I made it with the October kit from WWW.SCRAPBOOKOBSESSIONS.COM
Here are a few more random cards I made up with some other various fabulous products. I have some more cards to add but the glue is still drying and I have to photograph them and IM NOT DONE YET. I will probably still be making them up until time to go...
This is just a sampling..... Most of them are like this though. Simple cards with simple sentiments. I am doing some Holiday ones also though.
I know on Facebook ya'll were asking to see what I was working on. So, I hope that fed your curiosity :) SO, YOUR TURN. WHAT ARE YOUUUUU WORKING ON? GETTING READY FOR FALL? TELL ME IN THE REPLIES. Ok Back to work... Got my production line going haha.
Tuesday, October 13, 2009
12 months of October Afternoon!!!
I fell absolutely in love with this kit from www.Scrapbookobsessions.com! I LOVEEEE this OCTOBER AFTERNOON PAPER! IT is adorably cuttteee! The little animals are so precious. YOU can do SO MUCH with it. IT has also got fruit and flowers and fall things You can switch sides and make it spring summery.. It is so versatile. I MADE AN ENTIRE CALENDAR WITH IT!!!! CHECK IT OUT!
I got these pictures just in time... now its raining... :blink:
John had cut out these blocks of wood for me when I was doing all these mini albums at Christmas one
year. I thought THIS would be PERFECT to do a little calendar with. :blink:.
I ran out of the twine when I was tying them together though, so it took me a little longer to get this project made.
because I had to order some more lol but FINALLLYYY here it is: I added extra photos of it hanging
in my foyer and laying outside so you might can see it. It is hard to photograph....
I used Making Memories edge distresser on the October Afternoon Papers Inked the edges with
colorbox Inks. Favorite Findings buttons The Prima flower from the kit I used Glimmer mist
Iridescent Gold then highlighted with the colorbox inks on the Jeni Bowlin Calendar.
I cut out the little Pig to peek out of the flower,
Feb:
I used Vintage pink Glimmer mist Queen and company felt border, Making memories paper clip
creative imaginations twill, Making memories edge distresser colorbox fluid ink chalks I cut the sheep out and
pop dotted them onto the page.
March I took Green heart bling and put them together to make clover. I used some
old stickers cutting them out used the word "lucky" sentiment across the top.
I used one of the strings in the cord of rope to make the stem of my shamrock clover and used
a green marker on it.
I added Happy St Patricks Day ribbon across the bottom since that is one of the things March is
Known for.
I also used Iridescent Gold glimmer mist on this page to represent the pot of Gold your supposed to get if you
catch that leprechaun.
April:
I used vintage pink Glimmer mist I also used Crystal stickles on all of the polka dots to represent Rain drops. also lightly
on the flower.
I cut that little duck out (about 4 times since my neighbor kept making me decapitate the chicken... since he was using his skill saw and scaring me to pieces)
I distressed the paper with the glimmer mist ruffed the edges with the edge distressed inked it added the rain drops, used the MME Buttons that were an add on this month* Inked the Jeni Bowlin calendar And added the little duck.
I used The Threading water punch on this one to make a little border in the center. Inked the edges of it. hand cut those little flowers
I cut down the little alphas that were in our kit this month and over lapped them to make them whimsical.
I used the Iridescent gold glimmer mist. wrinkled up my calendar for a shabby chic look. inked the edges and distress edged it with the MM edger. I pop dotted some of the flowers. (I meant to put bling on the centers of the flowers and just realized I missed that sorry)
June I used a piece of burlap that i pulled loosely i inked my OA paper heavily for contrast I put some ribbon through
the Jenni Bowlin button. used Creme De Chocolate Glimmer mist VERY LIGHTLY then rubbed it with my finger off the calendar to the edges.
then inked the edges of the calendar with my colorbox fluid ink chalks. I cut out the cow and pop dotted him on there
***** ALL THE EDGES OF THE WOOD HAVE BEEN INKED HEAVILY.
THEN YOU TURN THE PROJECT OVERRRRRRRRRRR~~~~~~>>>> TO THE BACK ..... YEAH ITS REVERSIBLE
Celebrate the 4th of July with the loud crowing rooster... I used Queen and company stars and accented it with Crystal Stickles , Stars and stripes ribbon held with staples, iridescent gold Glimmer mist on the calendar and inked the edges with colorbox fluid ink chalks.
August: Suede Glimmer mist, Iridescent Gold glimmer mist offray ribbons, Making memories tiny alphas, October afternoon alphas
I cut the sheep and the apple out of the papers and used the October Afternoon stickers.
September, Latte Glimmer mist, burlap from my stash, I cut out the fruit from the October afternoon Patterned Paper.
October Afternoon stickers
Iridescent gold glimmer mist colorbox fluid ink chalks tangerine stickles, black diamond stickles, bazzill just the edge, prima leaves
burlap, versa mark inks
Nov
Creme De Chocolate glimmer mist, Iridescent Gold Glimmer mist, Lime green stickles, Crystal Stickles wal mart leaves, mm distresser, colorbox fluid ink chalks, versa mark inks, MME buttons, zig writer, maya road twine
MM edge distresser, Colorbox fluid ink chalks, Prima bling, unknown bling (star) crystal stickers bling, All my memories metal embellishment (present) iridescent Gold glimmer mist, Crystal Stickles, maya road twine, versa color inks.
Here is another look at it hanging on a wall IT is hard to photo graph this all hanging so as to see it good....
The Other side:
This was really fun to make. I loved the little animals (how cute are they) and have so many more ideas floating around to do with this. Off to go create!! Happy Tuesday!
Friday, October 09, 2009
October Afternoon
I love these papers by October Afternoon. I have been knee deep in this kit this month. I am loving all of the little farm animals and cannot get enough of them.
I apologize in advance for these photos. I have tried to get better photos and there is a glare every way I have tried. SO, I took more than one so You can see it for all of its worth It is on the BLING by Bazzill Cardstock See the sheen on the back ground paper. LOVEEEE THAT! ALso the Bazzill Just the edge I added all that sparkly to it. I will show ya!
First: I inked the edges with Color box fluid ink chalks in chestnut roan (one of my most favorite of all time colors I cant live without this Those and the Tim Holtz Distress inks do not leave my side)
THEN: I went over with Ranger Stickles in Tangerine. IT IS ALOT easier to ink it FIRST PRIOR to Stickling or GLittering.. Just a tip there for ya.
(you will see this on the bottom of the layout)
Remember those awesome punches and stuff my Mother in Love got me a lil bit back? Well some will make their debut today on this layout
see them there at the top?
I am having sooo much fun with this kit but.. I am waiting on something in the mail to go with it so I can finish what I am working on. (PRAYING TOMORROW IT WILL BE HERE!)
Im working on an altered project. Here is a peek for now I will let you see the rest when it comes in the mail and I can finish it up. Im kinda stuck till it gets here.
Thursday, October 08, 2009
its all scrappy
IM busy scrappin... I have glitter all in my hair.. so.. ughmm
im ok..I will be posting some good stuff soon. so just be ready.. to feast your eyes
Im in heaveeeeeen with this kit. There was a mix up and I got mine a little later so Im bookin it tryin to get my stuff done. and I also ran out of some of the twine but Im doing a BIGGG altered thing too. OK back at it.
toodlessss
xoxoxoxox
Friday, October 02, 2009
HAPPY WORLD CARD MAKING DAY!!
HEY YALL!! IS everyone making cards for WORLD CARD MAKING DAY? DO YOU HAVE A BIG STACK FORMING? ARE YOU AT A CROP? IN YOUR PJ'S WATCHING MOVIES WHILE YOU SCRAP? WHATS THE SCOOP? WHATS THE STORY? let me know... Inquiring minds haha! I thought I would add this to give you some more inspiration!
Here is a tutorial I did for Scrapbook Obsessions a while back. This was originally taught to me by a friend of mine at our local scrapbook store. I have kinda put a few variations on it and made it my own (actually I forgot some of the steps she showed) but it is pretty much the same thing. (THANK YOU STEF YOU ROCK!) It is really fun to get your children involved in also! They love making cards! It is fun to see what they come up with. Bella loves to make her teacher cards. (HOW SWEET IS THAT?)
I always need ideas for a quick gift to give teachers, friends or family. This has been a life saver gift for me on many occasions! SO come on lets have some fun!!
Its not hard, so get you some supplies and join in.
I have broken it down in easy easy steps, so even a beginner can play along! It is very inexpensive to make also. You can buy packs of these 6 x 6 page protectors at Hobby Lobby and there are about 10 in a pack.) really inexpensive (under 5 dollars and they go on sale cheaper than that) I am always making cards with leftovers. So this is another one of those inexpensive projects! SCORE! (Mostly leftovers from various kits)
I used Patterned paper from Fancy pants
card stock
rub ons
chipboard shapes
buttons
stickers
color box fluid ink chalks
1) 6 x 6 page protector
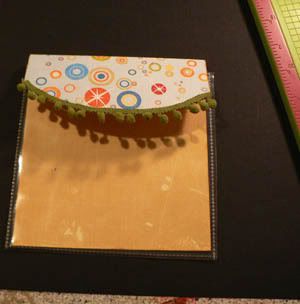
take a 6x6 page protector and cut the part that you put into the album off just after the seam.
Cut a piece of double sided paper to 8 1/2 x 5 1/2.
Round one end, you can use a dinner plate or a bowl and trace around the edge of it then cut. Ink the edges
SCORE at 2 and 1/2 and at 3 inches from the rounded edge.
slide down inside the page protector. Place a velcro sticky on the rounded edge of card stock and one on the matching side of the page protector to hold it closed.
You can decorate with a piece of Fiber or twill (cute little frilly ball hangy fiber as I have here) Jewels, buttons etc.
To go around the edge.
THEN make 4 general occasion cards.
Here are the ones that I made:
I am working on a few more things that I HOPEE to get posted today. I really love this little tutorial and since IT IS "WORLD CARD MAKING DAY." I thought it would be fun to share This "TUTORIAL FROM THE PAST" again with you guys. I really do enjoy writing tutorials. I miss doing that. Makes me realize how much I miss it. There are a lot of New scrappers out there that have not seen these. I also have had some requests for some of these as well.
Hope you have a great Saturday and LET ME KNOW, ARE YOU MAKING CARDS TODAY? where are you scrappin? Are you going to a crop today? What are you up to today? You know I am home bound these days due to the MS so I love to hear about these things lol SO I CAN LIVE VICARIOUSLY THROUGH YOU GUYS!!! SHARE PHOTOSSSSS PLEASEEEEE!!!
HUGS PEACE AND SCRAPPY LOVE MY FRIENDS!!!!
I will have moreee scrappy stuff for you guys laterr!
World Card Making Day
The Scrapbooking/Stamping/crafting/papercrafting/cardmaking (did I cover it all?) Industry is all abuzz with news Of WORLD CARD MAKING DAY tomorrow.
In respect of this I put together 2 simple little cards using some of the scraps I had left from last months Spread Your Wings kit from WWW.SCRAPBOOKOBSESSIONS.COM These are really simple simple non complicated cards that any skill level could make.
That is what I like about making cards. It is a fun sentiment to give to someone. They enjoy it and I enjoy giving it to them to brighten their day.
This card didn't take that long to make. I will be making a ton more cards to donate to the Fall Festival at Bella's School. This is one of their BIGGEST fund raisers. All of the proceeds go to keeping the costs down so these children get the best education they can.
IF you could see the things these children are doing you would be amazed. It just has me in awe. Just love that we are apart of this place. :)IT blesses the parents as well as the children.
Here is another Card. I thought this would make a good Wedding, Anniversary, Valentines, You could use it for so much,
The inside of these cards are blank. With a white insert so you can put your own sentiment. SO WHAT ARE YOU WAITING FOR? Get started making cards today! Replenish your stash and start making others smile. Just to say hi, or maybe you have birthdays or want to get started on the upcoming holidays. :)
I will have some tutorials up soon. Tomorrow I am going to be making MORE CARDS and showing you some more ideas of things you can do to celebrate WORLD CARD MAKING DAY.
SO do you have big plans? Will you be making cards? TELL ME HERE IN THE REPLIES. I WOULD LOVE TO HEAR FROM YOU.
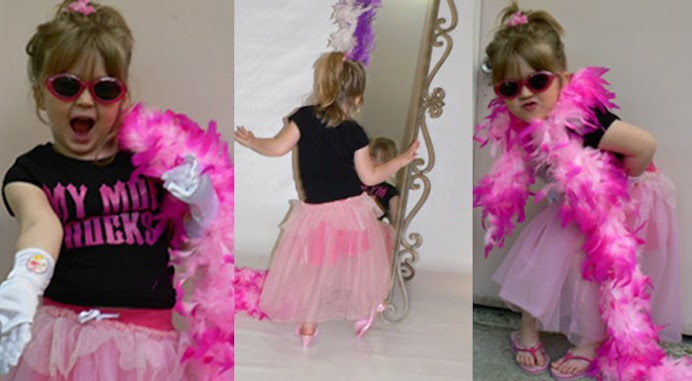
Also TODAY the 4th quarter edition of STAMPING* STATIONERY* AND SCRAPBOOKING at Hobby LOBBY should hit the shelves. It is the Fall Halloween THanksgiving and Christmas Edition. YOU SHOULD NOTE THERE IS A 40% coupon on the BACK COVER OF THE MAGAZINE ALSO!! BE sure to use YOUR COUPON!! ( See if you recognize the little girly on pages 9, 10, 16 and 43)
Subscribe to:
Posts (Atom)